Please refer to the video below.
Installing the PPF Kit
Work indoors if you can, to reduce the chance of pollen, bugs or other airborne contaminants landing on the film while you work. Install in temperate conditions, between 60°F and 80°F (16°C and 27°C).
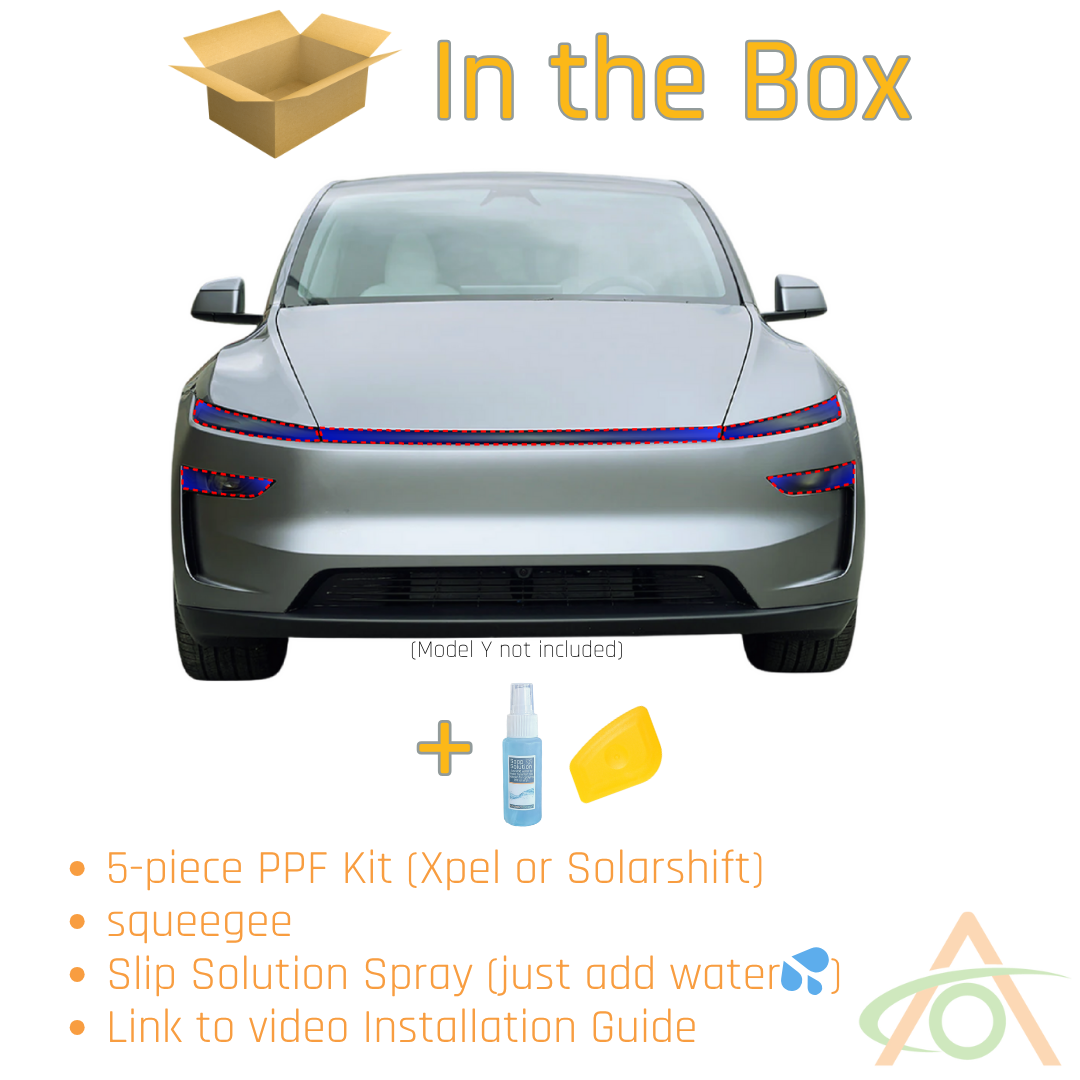
Before you start, add water to the slip solution concentrate to hydrate it. The kit contains five pieces: three for the light bar and one for each headlight. Headlight pieces are always clear, so the matrix headlights are not obscured. If you ordered the stealth kit, the three light bar pieces are satin.
Light bar – passenger side segment
- Clean the light. Spray it with slip solution and wipe it down with a shop rag to remove bug splats and road grime.
- Spray the light again, liberally.
- Take the matching PPF piece and spray the top of it.
- Spray your fingers, then peel the backing off. As soon as the piece is free, spray the adhesive side so it can't stick to itself.
- Spray a little more solution onto the light, then lay the piece in place. It should settle into the shape of the light on its own — no heat is needed.
- Hold the piece roughly in place with two fingers and make a first light pass with the squeegee from one end to push out some of the slip solution. Work down the piece with light pressure. At this stage you are only removing fluid, not setting the position.
- While the film still moves, line up all the edges. No edge should overhang the light, or dirt will collect there later.
- Squeegee again with more pressure, working from the center outward in both directions until all the slip solution and air bubbles are out. Angle the squeegee at roughly 30–60 degrees and work along and down, which flushes the fluid out more effectively. Take your time — allow at least twice as long as it looks like it should take.
- If the squeegee starts to drag on the surface, spray more solution on top.
- Dry the area off with a shop rag.
Light bar – center segment
- Clean and spray the center section of the light bar.
- Pop the frunk. You don't need to open it all the way — just enough to see the rubber seal that runs across the top of the light bar. You will use that seal as your alignment guide.
- Spray the light again, spray the top of the center piece, spray your fingers, and peel the backing off. This is the largest piece and the trickiest to handle, so take your time and keep it sprayed so it can't stick to itself. Roll the backing off from one end and hold the piece at the other end.
- Move the piece onto the light as quickly as you can so nothing can land on the adhesive side, and pick up your squeegee.
- Position the top edge so it butts up against the rubber seal. Don't push it so hard that it bends against the seal — just use the seal as a guide. The piece is cut slightly short because it stretches a little as you squeegee it out.
- Check the alignment at the left and right ends.
- Squeegee once in each direction to release the bulk of the slip solution, then increase pressure and keep working both ways until all the solution is out.
- Wipe the area dry.
Light bar – driver side segment
- Repeat the same process: spray your hands, spray the piece, spray the light, peel the backing, spray the adhesive side.
- Place the piece and check that it still slides freely. If it snags anywhere, peel it back and add more solution underneath.
- Hold it in place and squeegee both ways to flush out the bulk of the fluid.
- While it still moves, line it up properly, then squeegee it out fully and dry it off.
Headlights
- Take the clear piece for the driver side headlight.
- Spray the headlight, spray the piece, spray your hands, then peel the backing and spray the adhesive side.
- Lay the piece on the headlight. If it grabs and stops sliding, lift it and add another coat of solution until it moves freely again.
- Squeegee lightly first to remove the bulk of the fluid while keeping the film movable.
- Line the piece up on all corners. Check the lower edge in particular — nothing should overhang the edge of the headlight. Nudge the film up if it does.
- Squeegee out the remaining fluid and dry the headlight off. Check the clear film carefully for trapped solution, as it is much harder to see than on the black areas.
- Repeat for the passenger side headlight.
After installation
- Park the car outside in sunshine. Sunshine is the key, even if it's cold. This evaporates any remaining moisture and clears micro bubbles.
- Try not to drive the car for 24 hours. If you must drive it, avoid heavy rain or snow — water can get under film that hasn't fully cured.
- The film is self-healing. If it picks up a scuff or light scratch, park the car in the sunshine and it will heal.