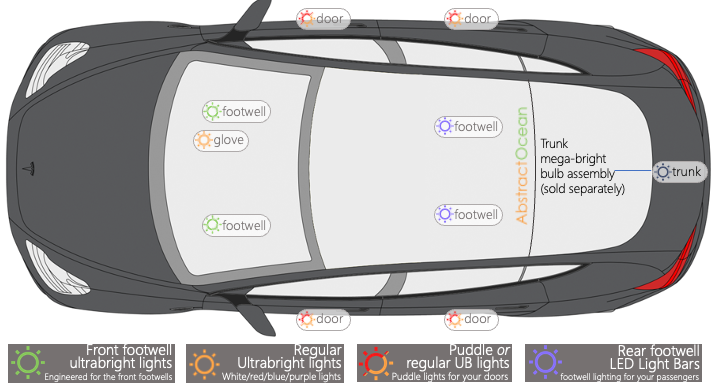
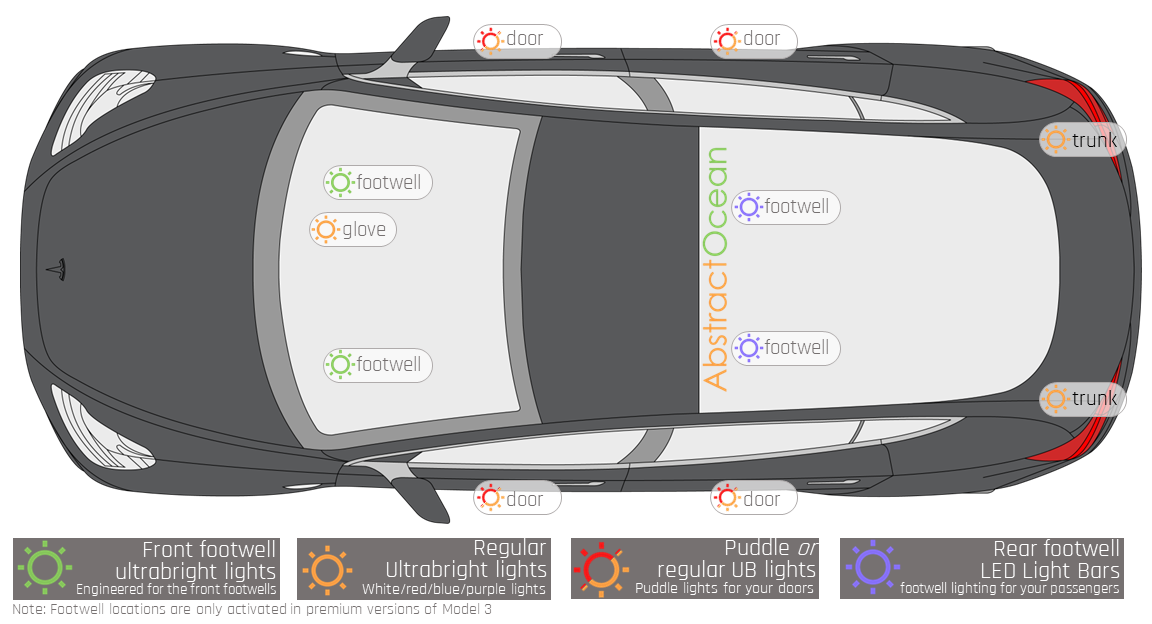
You can see the installation locations here for Model 3, and here for Model Y.
Please refer to the video below for installation instructions:
Installing the bulbs
The car uses seven regular ultra bright bulbs (one in each of the four doors, two in the trunk, one in the glove box) plus two footwell bulbs. The footwell locations need the dedicated footwell bulbs — the regular bulbs will not work reliably there, because the car dims the footwell locations by reducing the voltage.
Before you start
- Roll down all the windows. When you pull a door bulb the car reads it as a blown fuse and resets the door. If the window is up, it will roll fully up and hit the trim when you close the door.
Doors (four bulbs)
- Find the small recess at one end of the factory bulb. On the front doors it is on the front edge.
- Dig the spudger into the recess and twist until the bulb pops out of the trim.
- Pull the bulb out. If the wire feels bound up inside the door you can pull gently, but don't force it. Hold the connector so it doesn't disappear back into the door.
- Slide the spudger between the plug and the bulb to release the clip inside, then pull the plug off.
- If the cable is too short to plug the new bulb in comfortably, fit one of the supplied extension cables onto the plug first. Two extensions are included.
- Push the connector onto the new bulb until it clicks.
- Tuck the wiring back into the opening and push the bulb up into the trim until it seats.
- Repeat for the remaining three doors.
The car may beep while you work on a front door — it thinks the manual door release has been used. The door lights also time out after a few minutes, so a bulb going dark on its own is normal.
Trunk (two bulbs)
- Get the spudger under the end of the factory bulb and twist until it releases. Keep working at it if it resists.
- Pull the bulb out and unplug it. A small black plastic clip sits on the connector; pull it off and keep it out of the car. It is not needed and is awkward to refit.
- Plug the connector onto the new bulb and tuck it back up into the opening.
- Repeat on the other side.
Some cars have an extra trim piece running across the top of the trunk. It stops short of the bulbs, so it does not need to come out.
Glove box (one bulb)
- Open the glove box.
- Dig the spudger in underneath one end of the bulb and twist it out. This bulb sits in hard trim, so it takes more effort than the door bulbs.
- Use the spudger to release the plug from the bulb.
- Plug in the new bulb and press it back into the trim.
Footwells (two bulbs)
- Locate the notch on the end of the factory bulb. On the passenger side it is on the left.
- Dig the spudger into the notch and twist. These sit in rigid trim and take some determination, but they do come out.
- Unplug the factory bulb and check you have a footwell bulb in hand, not a regular ultra bright bulb.
- Plug in the new bulb and snap it back into the trim.
- Repeat on the driver's side. There is very little spare cable at this location, and the pedals and steering wheel make it tighter to work in.